To begin, you must first register your website address in the Google system by following these steps:
- Step 1 (Sign In): Go to the Google Search Console website and sign in with your Google (Gmail) account.
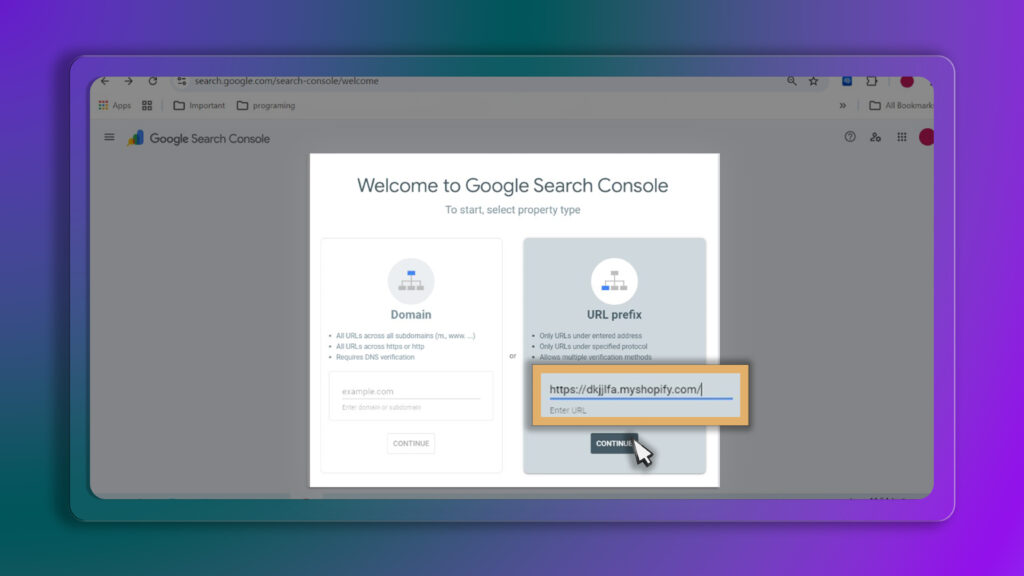
Step 2 (Select Property Type): Once logged in, you will see two options; select the URL prefix option to start.
- Step 3 (Enter Address): Enter your full website address (be sure to include
https://) in the designated box and click the Continue button.
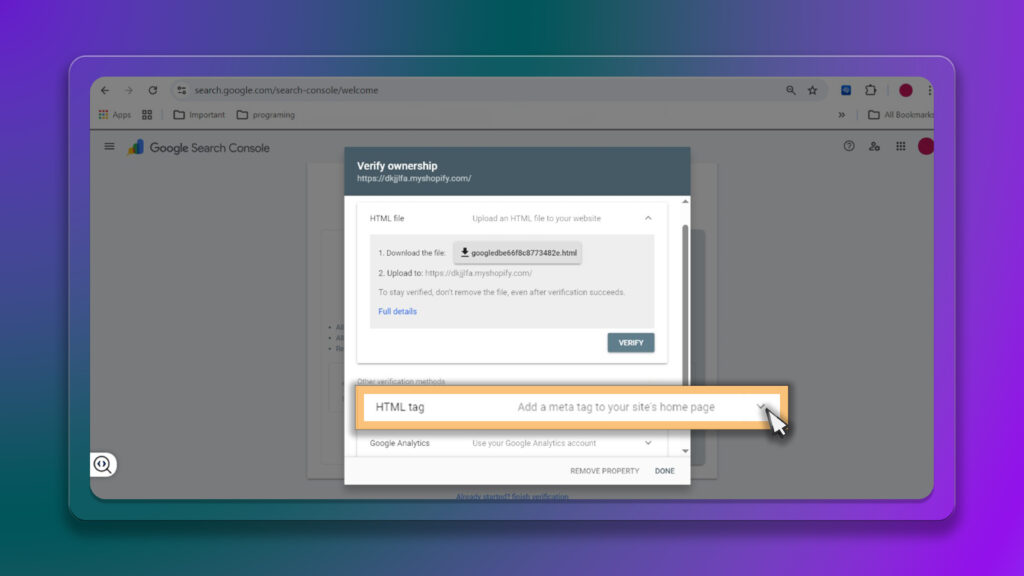
- Step 4 (Verify Ownership): After entering the address, Google will ask you to verify site ownership.
The four main methods for doing this are explained below:
This method is the most convenient way for most users because it does not require technical changes to the theme code or access to complex hosting files.
Steps to follow:
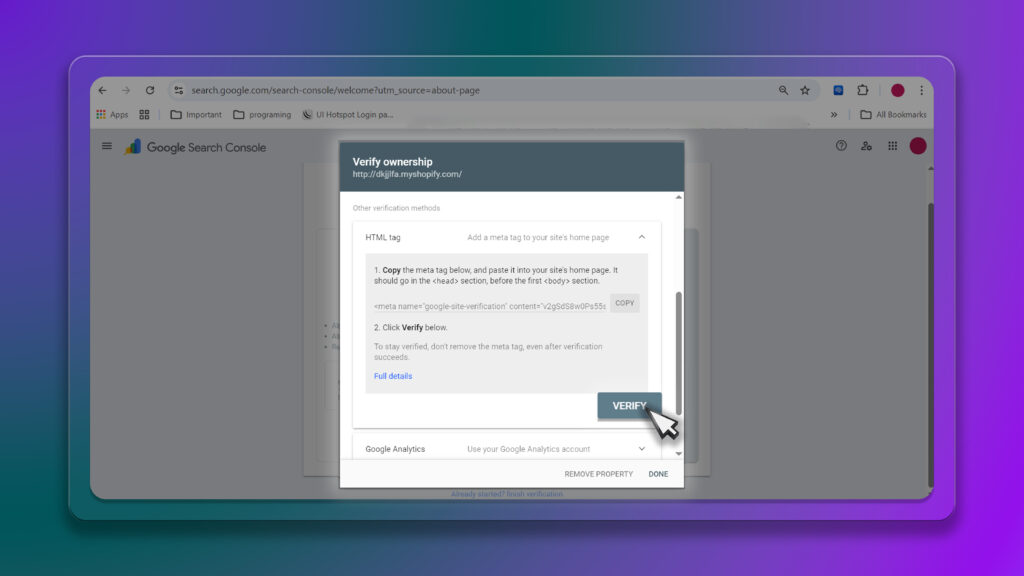
In the Google ownership verification page, click on the HTML tag option to expand it.
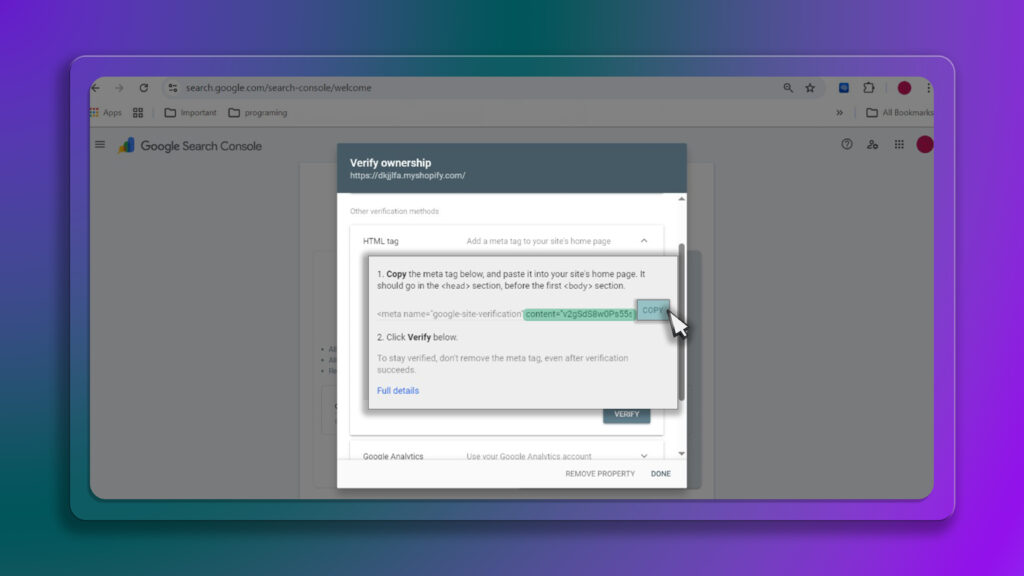
- A line of code will be displayed starting with
<meta name=.... You only need to copy the code inside thecontentsection (which is a combination of numbers and letters).
Log in to your website admin panel and open the SEO Buddy AI app.
From the left menu of the app, click on the Google search console option.
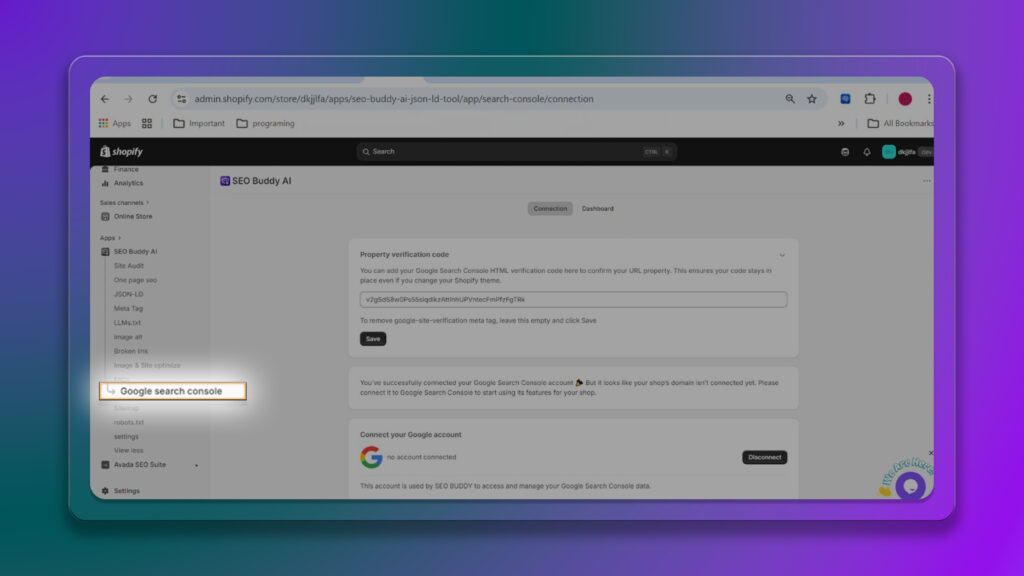
- In the first Empty field in Property verification code, paste the copied code and click the Save button.
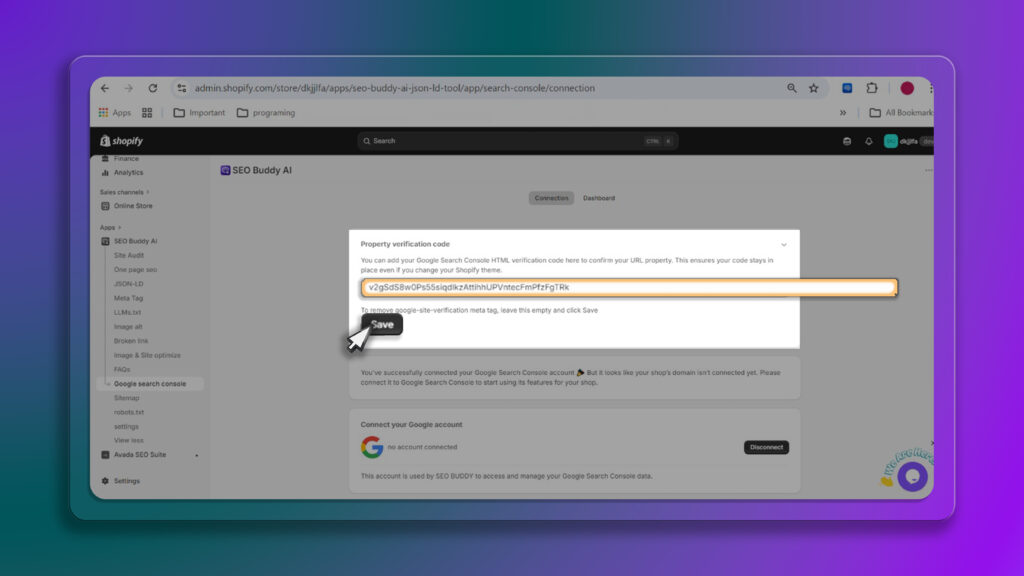
Finally, return to the Google page and click the blue Verify button.
Google Account Connection Step (Connect Google Account):
After your ownership is verified by Google, you must connect your account so the app can analyze site data and display it directly in your SEO Buddy AI dashboard:
In the Google search console page of the app, scroll down to the Connect your Google account section.Click the Connect button.
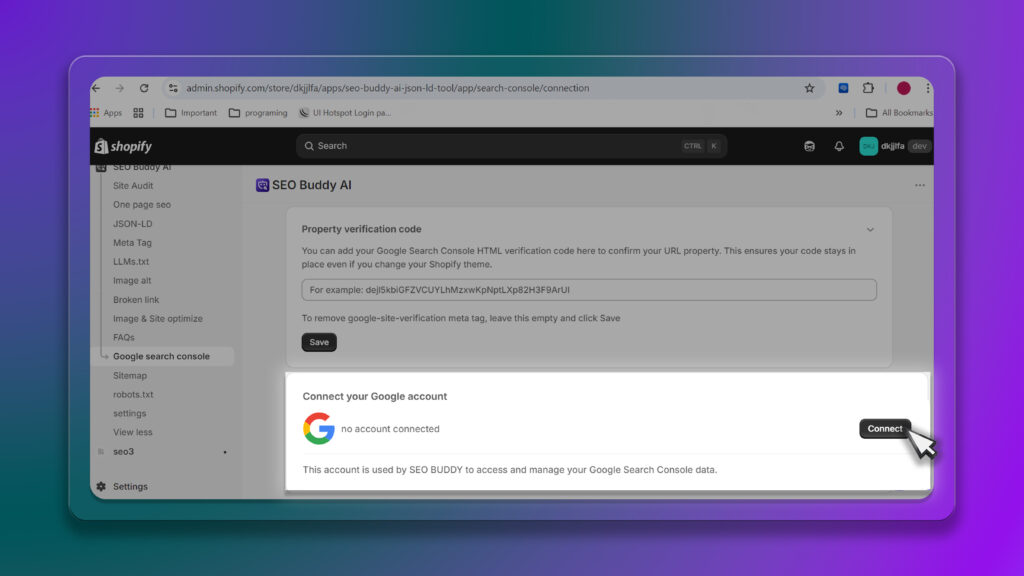
Select the Gmail account you used to set up the Search Console to grant the necessary permissions; you should then see a success message for the connection.
I just like the helpful information you provide in your articles
There is definately a lot to find out about this subject. I like all the points you made
So great to find someone with some original thoughts on this topic. Really.. thank you for starting this up. This website is something that is needed on the internet.